

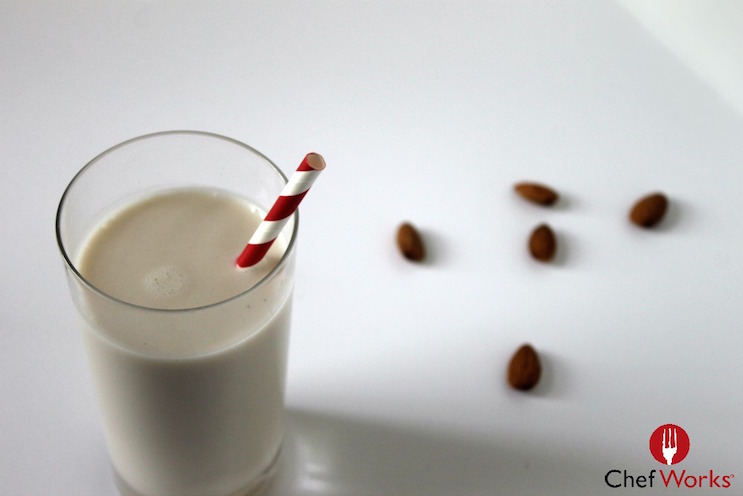
I have been on an almond milk kick for quite some time now. It satisfies my craving for milk after a workout, but is more friendly towards my body. I drink it, use it in smoothies, eat in my cereal, and bake with it. So basically any time a recipe calls for cows milk, I substitute in almond milk.
Almond milk is less heavy than cows milk. Though it is super light, it is super creamy at the same time. The crisp refreshing flavor just tops it all off.
After a while, buying almond milk adds up. So you end up saving a lot of money by making your own almond milk from scratch. It is also a huge bonus to make it from scratch because you can keep out weird unwanted additives, and really tailor it to your preference.
Making almond milk from scratch couldn’t be easier! There are only a handful of steps, and most of the process is downtime. Since it is so simple to make, and I almost always have almonds on hand, I can never bring myself to get store bought almond milk.
There are many reasons to love almond milk. Many choose it simply as a healthier alternative to cows milk that supports weight loss. While others enjoy that it is easier to digest, and doesn’t result in indigestion or gas like cows milk commonly does.
The list of health benefits of almond milk goes on and on. Almond milk barely impacts your blood sugar, and boosts your immune system. It also supports healthy muscles, organs, and glowing skin. As well as eye health support and reducing your risk of cancer.
To make coffee creamer, just use less water (about ½ as much) and add whatever sweeteners and spices you want. I’m thinking next fall I’ll make some with pumpkin spice, vanilla and honey. Mmmm!
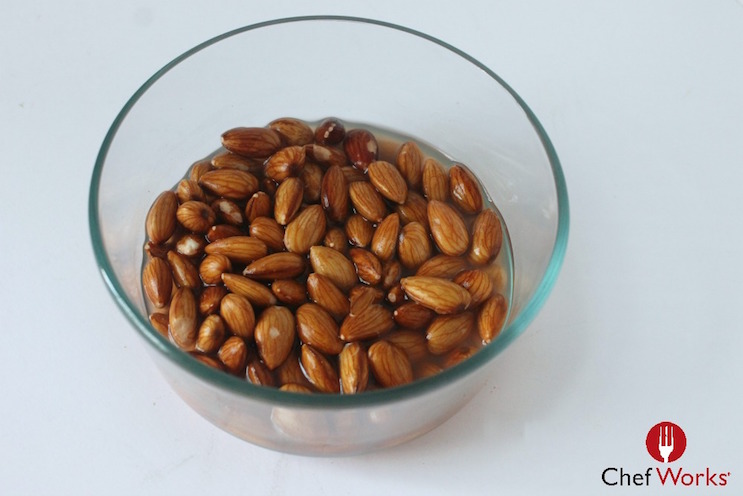
Start with one cup of raw unsalted almonds. You could also use dry roasted almonds for a bolder flavor.
Cover the almonds in water, covering them by about an inch. They will plump and soften as they absorb water. Let stand, uncovered, overnight or up to 2 days. The longer the almonds soak, the creamier the almond milk.
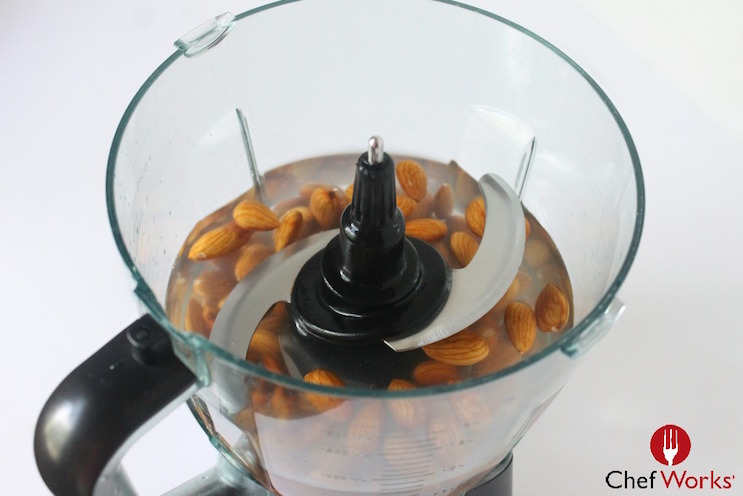
Drain the almonds from their soaking water and rinse them thoroughly under cool running water. At this point, the almonds should feel a little squishy if you pinch them. Place the almonds in the blender and cover with 2 cups of water.
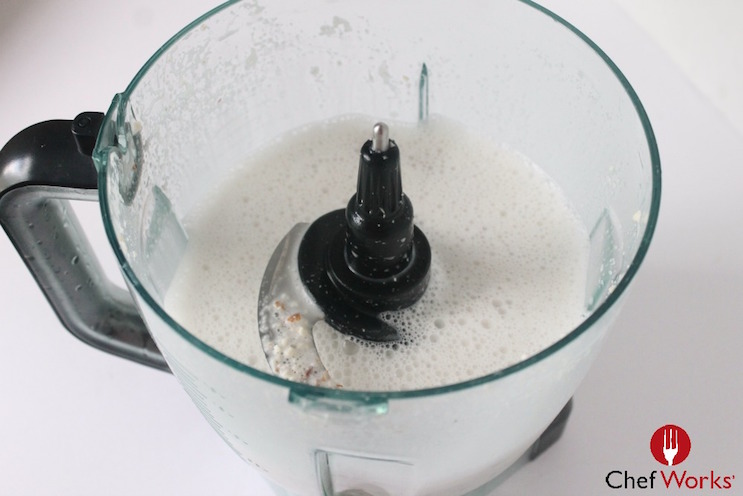 Pulse the blender a few times to break up the almonds, then blend continuously for two minutes. The almonds should be broken down into a very fine meal and the water should be white and opaque. (If using a food processor, process for 4 minutes total, pausing to scrape down the sides halfway through.)
At this point, you could put the blender into the fridge and let the almonds soak a second time for an even creamier product. Once it is done soaking (overnight is suggested) just blend it a second time before proceeding.
Or if the almond milk is thicker than you are used to, you can simply add water until it has reached your desired consistency.
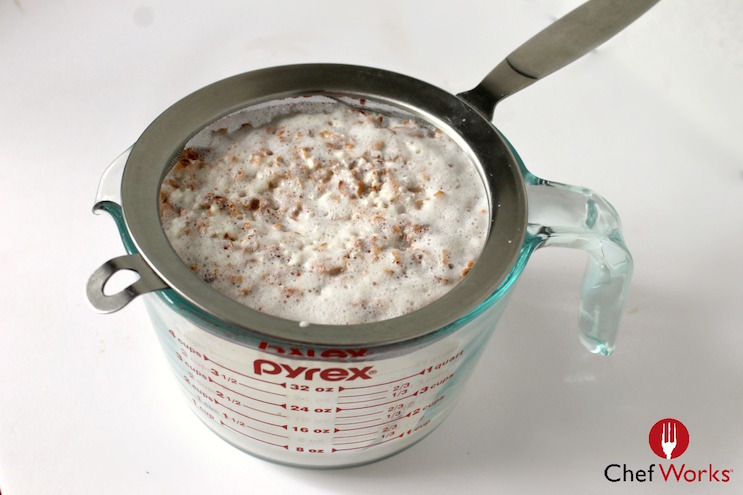
Place a fine mesh strainer over a large glass measuring cup. You could also line it with a cheesecloth or nutbag if you are making a larger batch.
Place the strainer over a measuring cup. Pour the almond mixture into the strainer. Press the meal with the back of a spoon, and stir it to get all of the milk out. Taste the almond milk, and if a sweeter drink is desired, add sweetener to taste. You could try maple syrup, honey, stevia, or agave to keep it healthy.

So, what do you do with the leftover pulp? The leftover almond meal can be added to oatmeal, smoothies, and muffins as it is. You can also spread it out on a baking sheet and bake it in a low oven until completely dry (2-3 hours). Dry almond meal can be kept frozen for several months and used in baked goods, such as cookies or brownies for added protein and fiber.
Almond Milk
Ingredients:
- 1 cup almonds
- 2 cups water + water for soaking
- sweetener to taste (optional)
Directions:
Place the almonds in a bowl and cover with about an inch of water. Let stand, uncovered, overnight or up to 2 days. The longer the almonds soak, the creamier the almond milk.
Drain the almonds from their soaking water and rinse them thoroughly under cool running water. At this point, the almonds should feel a little squishy if you pinch them.
Place the almonds in the blender and cover with 2 cups of water.
Pulse the blender a few times to break up the almonds, then blend continuously for two minutes. The almonds should be broken down into a very fine meal and the water should be white and opaque. (If using a food processor, process for 4 minutes total, pausing to scrape down the sides halfway through.)
Place the strainer over a measuring cup. Pour the almond mixture into the strainer. Press the meal with the back of a spoon, and stir it to get all of the milk out. Taste the almond milk, and if a sweeter drink is desired, add sweetener to taste.
Recipe Notes:
- The almond milk should be store in sealed container (such as mason jars) in the fridge for up to 7 days.
- Your milk will separate after a little while in the fridge. This is totally normal, just give it a good shake.
- Almond milk is also freezable. So you could make a very large batch and store it in freezer bags, or tupperware in the freezer until you needed a refill in your fridge. In which case you would just thaw and dump into a pourable container.
- You can make chocolate almond milk by adding a bit of cocoa powder and sweetener of your choice.
- You can make macadamia milk, walnut milk, cashew milk, and pecan milk by using the same method. Just substitute in your nut of choice in place of the almonds.
How will you enjoy your homemade almond milk?