

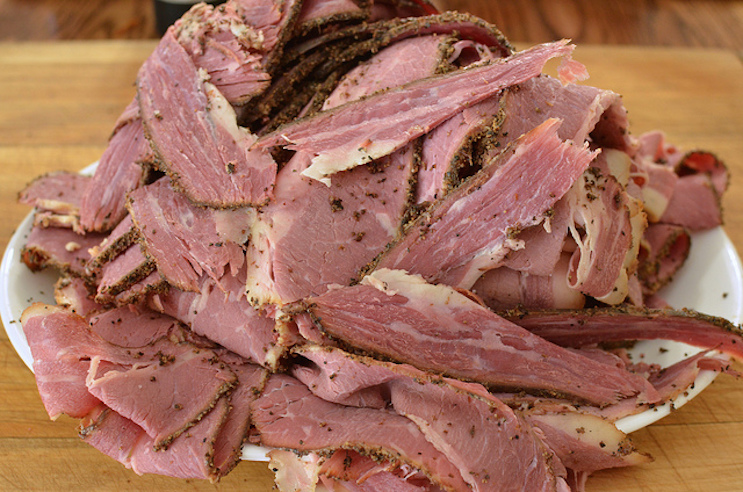
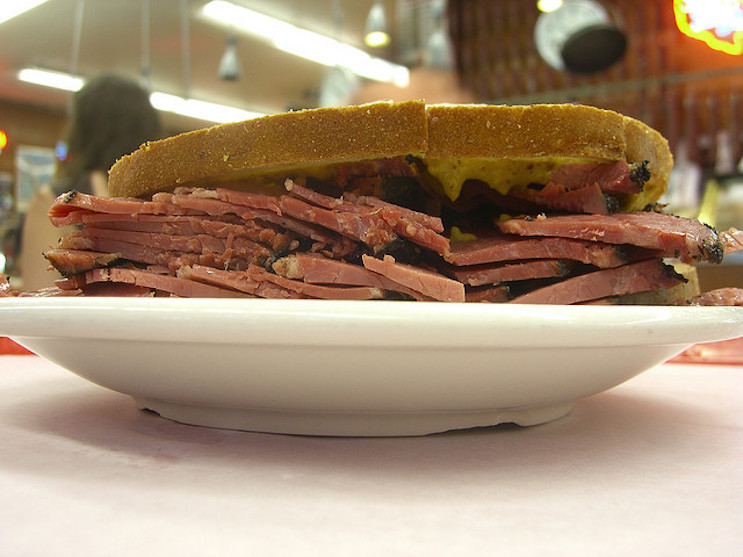
Pastrami is an evocative food. It conjures images of sky-high sandwiches served at New York delicatessens, piled high with moist, unctuous sliced meat, bookended with rye bread and perhaps a pickle on the side.
While deli sandwiches are a classic way to enjoy pastrami, it’s far from the full story of this unique meat delicacy. To master the art of making professional-grade pastrami, it’s important to understand what pastrami is and what goes into making this delicious meat.
What is pastrami?
While you’ve undoubtedly heard the term “pastrami”, it’s possible that you don’t know exactly what it is. You’re not alone; it can be a bit confusing. Technically, pastrami refers to a technique of preparing meat; however, many people also use the term to refer to a specific type of beef which is a particularly popular version of the method, especially in the United States.
Let’s explore both the method and the beef version.
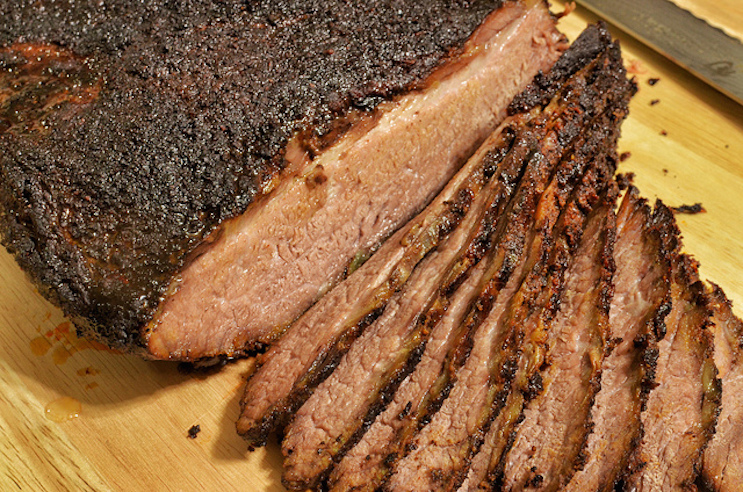
The method: The method of making pastrami goes something like this. First, the raw meat is brined and spiced. Then, it is smoked, which slow cooks the meat and adds flavor. Finally, it is steamed, which breaks down the connective tissue and makes the meat tender and soft.
The beef version: If you say “pastrami” in the United States, chances are high you’re talking about beef which has been treated in the method described above. Traditionally, beef plate or beef brisket is used.
While beef is the most famous version of pastrami, it’s not impossible to see different meats such as chicken, turkey, or pork turned into pastrami. Actually, in this way it’s sort of similar to jerky. While beef is the most popular version, all sorts of other varieties exist which are made in a similar fashion.
What makes good pastrami?
What are the key characteristics that can be used to describe a good pastrami? Moisture and robust flavor.
Moisture: If pastrami is dry, there is something very wrong. It should be quite moist, and because of the slow cooking and steaming process, it should be yielding in the mouth.
Flavor: Pastrami should not be bland. The entire cooking process is designed to bring out flavor and moisture. It is very rich, which is exactly why you want to pair it with mustard: that vinegar-y zing is a perfect contrast.
Serving pastrami
Sandwiches are a traditional way to serve pastrami. In New York, the traditional way to serve them is with rye bread, mustard, no cheese. Yes to a pickle on the side, if you want it.
That being said, if you can stand the scorn of New York traditionalists, there are a number of other delicious ways to serve pastrami. It’s great with non-rye breads, and tasty even as wrap sandwich or on a bagel. It can even be used as a creative pizza topping, or if you’re in Utah, it’s featured on a popular type of hamburger.

Making pastrami at home
You can indeed make pastrami at home. Considering that the majority of us do not have smokers at home, that step has been omitted from this at-home recipe, but you will still end up with a very authentic and delicious result
Be prepared for a long haul of a cooking project, as it requires many steps. But while the many steps involved make it time and labor intensive, it’s not a difficult project to take on. And the reward will be perfectly moist, juicy pastrami.
Before you get started
Here’s what you’ll need to make pastrami at home.
Brisket: Choose a 3-4 pound cut, with fat attached. You can have your butcher trim the fat to ¼ inch thick to make your initial steps easier.
Supplies: Rally up a large stock pot, a 2 gallon food and heat-safe container with a lid, and a 12×15-inch roasting pan with a rack.
How to make pastrami: a recipe
Adapted from Tori Avey, via The Artisan Jewish Deli at Home
Ingredients
For the meat and brine
- 3 quarts water
- 1 cup coarse kosher salt
- 1/4 cup curing salt
- 1 cup granulated sugar
- 1/2 cup light brown sugar, firmly packed
- 1/4 cup honey
- 2 tablespoons pickling spice
- 1 tablespoon whole coriander seeds
- 1 tablespoon whole yellow mustard seeds
- 4 cloves garlic, minced
- 3 to 4 pound beef brisket
For the spice rub
- 3 tablespoons coriander
- 2 tablespoons freshly ground black pepper
- 2 tablespoons smoked paprika
- Make the brine. Fill a large stock pot with three quarts of water. Add both salts, both sugars, the honey, pickling spice, coriander and mustard seeds, and garlic. Bring the mixture to a boil over high heat, stirring frequently to dissolve the granules of salt and sugar. Once it comes to a boil, immediately remove from heat. Set to the side for the moment.
- Add three quarts of ice water to a 2 gallon or larger food-safe container that fits in your refrigerator.
- Pour the slightly cooled but still hot brine into the container, and place the entire vessel in your refrigerator, uncovered, until it has cooled completely. Tori Avey advised that if one container does not fit in your fridge, you can also divide the brine and ice water equally between two smaller containers, and cut the meat in half so that it can be divided between them.
- Prep the meat. Trim excess fat from the brisket, until the fat is about ¼ inch thick.
- Fully submerge the meat in the now cool brine mixture, and cover.
- Allow the brisket to soak in the brine for five days (yes, five days), flipping it daily and stirring the brine.
- Get ready to cook. Pour four cups of water into the bottom of a large (12×15-inch) roasting pan. Position a rack in the pan, and place the brisket on the rack, fat side facing down.
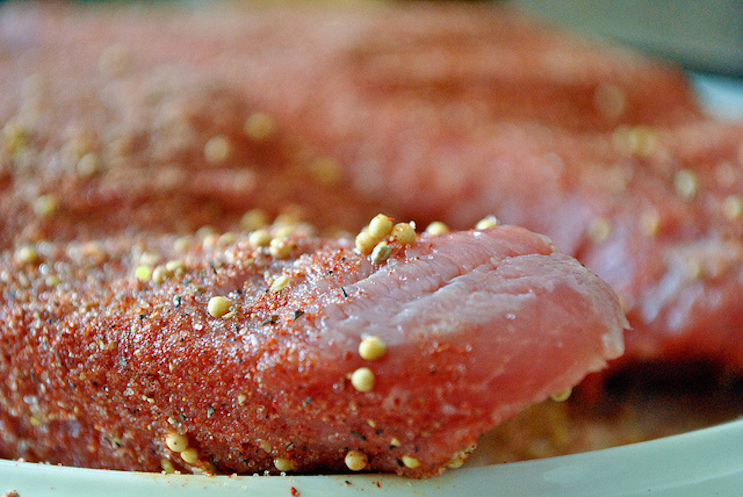
- Prepare the spice rub mix by mixing all of the ingredients together into a bowl. Rub the mixture evenly all over all sides of the brisket. Now, let the brisket sit until it comes to room temperature, as long as 2 hours.
- Near the end of the sitting period, preheat the oven to 300 degrees, and position a rack toward the bottom of the oven so that the entire pan can fit with clearance on top.
- Cover the brisket tightly with two layers of aluminum foil.
- Bake until the meat has reached an internal temperature of 200 degrees. This takes about 1 hour per pound of meat.
- Once done, remove from the oven and let it rest for several minutes so that you don’t lose any juices once you cut the meat.
- Cut the pastrami (fat and all) into slices as thin as possible while keeping the meat intact and not falling apart.
Keep wrapped in airtight containers in the refrigerator for up to one week, or in the freezer for several months.
Pastrami is a classic deli food, but it’s suitable for everyday enjoyment in your own house. Not only does making homemade pastrami give you serious bragging rights, but if you want cheese on your sandwich, no New York deli snobs can say anything about it!
What version of pastrami will you choose?